
 About Us
 Why K12?
 Safety Needs
 How Students Succeed
 FAQs
 Online Elementary School
 Online Middle School
 Career and College Prep
 Online High School
 Student Clubs
 Career and College Services

 Inside the Online Classroom
 A Day in the Life
 Social & Extracurricular
 Advice, Tips & Inspiration
 Benefits for Life

 Enroll
 All School Options
 Need More Help?
How to Build a Rube Goldberg Machine
Learn how to build a Rube Goldberg machine with everyday materials, creative ideas, real-world examples, and easy instructions. Read on for more!
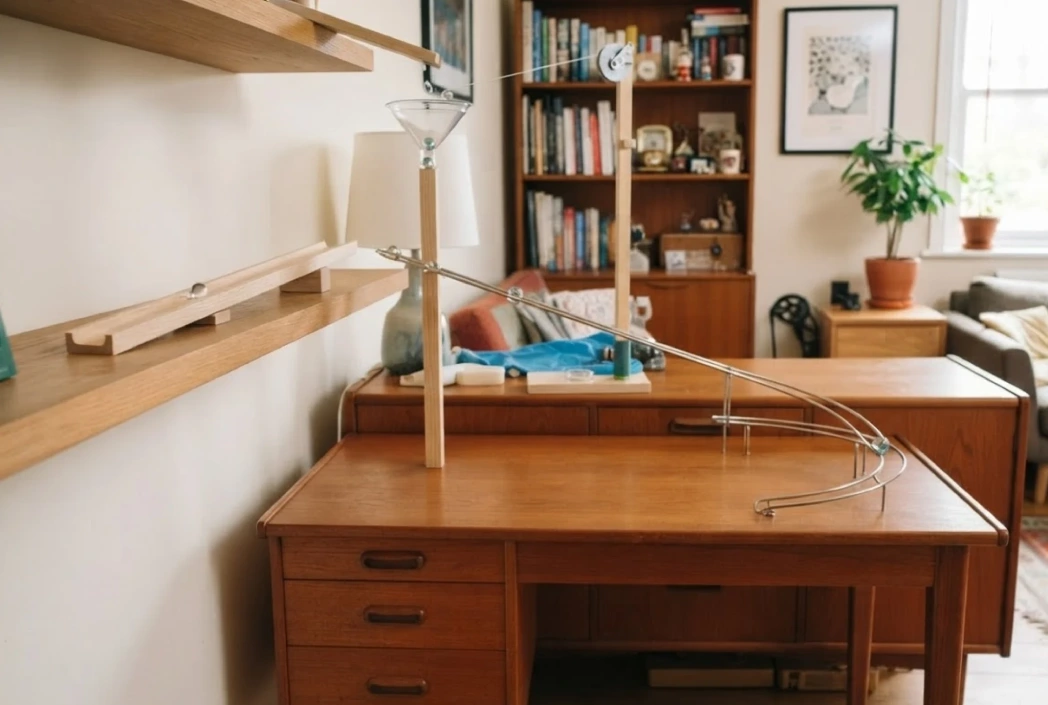
Table of Contents
A Rube Goldberg machine is a deliberately over-complicated contraption that performs a simple task through a complex chain reaction.
What is a Rube Goldberg machine?
Named after cartoonist Reuben Goldberg, Rube Goldberg machines use maximum effort to accomplish minimal results. Goldberg studied engineering at UC Berkeley but became famous in the early 1900s for humorous cartoon drawings of absurd contraptions that performed everyday tasks in ridiculously complicated ways.
The term became so popular that “Rube Goldberg” entered the dictionary as an adjective describing an overly complex process. Although Goldberg never built his cartoon inventions, his legacy inspired generations of engineers, educators, and creative thinkers to bring them to life.
What is the purpose of a Rube Goldberg machine?
Rube Goldberg machines turn simple tasks into creative, multi-step sequences where one action triggers the next. Building one develops problem-solving skills, makes STEM concepts engaging, and promotes creativity, persistence, and hands-on learning.
Rube Goldberg Machine Examples
Rube Goldberg machines combine creativity, engineering, and problem-solving in entertaining ways. They also appear in music videos, STEM competitions, and classroom activities, demonstrating scientific concepts in action.
- Pop culture: The rock band OK Go created one of the most famous Rube Goldberg machines for its 2010 music video, This Too Shall Pass. The room-sized contraption took months to design and has been viewed millions of times online.
- STEM competitions: Annual Rube Goldberg competitions challenge students from elementary school through college to build machines that complete simple tasks in at least 20 steps. These contests encourage engineering design, physics, and creative problem-solving.
- Hands-on education: Building a Rube Goldberg machine gives students a fun, practical way to explore concepts such as force, motion, energy transfer, and simple machines.
By combining creativity with trial and error, these projects make STEM concepts more engaging and give students a rewarding way to put scientific principles into practice.
How to Build a Rube Goldberg Machine
Building a Rube Goldberg machine is an iterative, creative process that involves planning, gathering materials, building in sections, and testing repeatedly. Expect trial and error; that’s where the real learning happens. Each failed attempt teaches you something new about physics, timing, and design.
The key is approaching it with curiosity and patience, knowing that even experienced builders need multiple tries before their machines work consistently.
Materials and Parts for Your Machine
You don’t need expensive supplies to build an impressive machine. Most materials come from around your house or recycling bin.
Rolling Objects:
- Marbles
- Toy cars
- Tennis balls
- Ping pong balls
- Round containers or bottles
Ramps and Tracks:
- Cardboard from cereal boxes
- Paper towel
- Wrapping paper tubes
- Books stacked at angles
- Rulers or yardsticks
Triggers and Dominoes:
- Standard dominoes
- Wooden blocks or Jenga pieces
- Playing cards stood on edge
Connectors:
- Duct tape or masking tape
- String or yarn
- Rubber bands
Containers:
- Plastic or paper cups
- Small buckets or bowls
- Empty yogurt containers
Structural Support:
- Cardboard boxes
- Wooden blocks or Lego bricks
- Books for creating height
Safety Considerations: Avoid heavy objects that could fall and cause injury. Skip sharp items like glass or exposed pins for younger builders. Adult supervision is required for any machines involving electrical switches or candles. Use battery-operated devices instead of plug-in electronics when possible.
Budget-Friendly Tips: Check your recycling bin first. Dollar stores carry dominoes, balls, cups, and tape for just a few dollars. Thrift stores often have toys and games with useful pieces at minimal cost.
Planning and Setting Goals
Smart planning before you start building dramatically increases your chances of success. Taking time to think through your design prevents frustration and helps you create a machine that actually works.
Choose the Right Number of Steps
Start with a step count that matches your experience level.
- First-time builders ages 8–10 should aim for 3–4 steps
- Ages 11–14 with some experience can try 5–7 steps
Once you complete a simpler machine, you can always add more steps to increase complexity.
Avoid the temptation to copy elaborate machines you see online. Those often took days or weeks to build and involved experienced creators. Starting simple ensures you’ll finish with a working machine rather than an abandoned project.
Consider Your Available Space
Think about where you’ll build and how much room you have. Tabletop machines work well for 3–5 steps and are easy to move or store. They’re ideal for classrooms or shared spaces. Floor-based machines allow for longer distances and more dramatic effects but need dedicated space that won’t be disturbed for several days.
Multi-level machines that start on a table and drop to the floor create exciting momentum. Gravity is your easiest power source, so using height differences helps steps trigger reliably. Just make sure you’re building somewhere that family members don’t need to walk through constantly.
Select Your Final Task
Choose a clear, observable goal that provides obvious feedback when it works. The best beginner tasks include:
- Knocking over a tower of cups or blocks
- Dropping a ball into a container
- Popping a balloon
- Ringing a bell
- Raising a small flag
Work backward from your chosen goal. If you want to ring a bell, what action would make that happen? Maybe a marble falling onto it. What would release the marble? This reverse-engineering approach helps you think logically about cause and effect.
Balance Ambition With Reality
It’s natural to want an impressive machine, but starting too ambitiously leads to frustration. Build a reliable 3-step machine first, test it until it works consistently, then add one more step. This incremental approach gives you regular success experiences while still allowing growth.
Remember that even simple machines require patience and adjustment. A 4-step machine that works reliably is far more satisfying than a 10-step machine that never quite functions.
Simple Rube Goldberg Machine Ideas
Beginner Machine: Ring a Bell (4 Steps)
Perfect for ages 8–11 and first-time builders.
Materials needed: Tennis ball, cardboard tube, wooden blocks, cup, marbles, bell
- Tennis ball rolls down a cardboard tube ramp
- Ball knocks over a line of wooden blocks
- The last block tips a cup filled with marbles
- Marbles fall onto a bell
This simple design teaches basic chain reactions and energy transfer. Test each step separately before connecting them.
Intermediate Machine: Pop a Balloon (8 Steps)
For ages 12–14 or experienced beginners ready for more complexity.
Materials needed: Toy car, cardboard ramp, dominoes, marble, paper towel tube, cup, string, pin, balloon
- Push the toy car down a cereal box ramp
- The car hits a line of dominoes in a zigzag pattern
- The final domino bumps a marble
- Marble rolls down a tube hanging off the table edge
- Marble lands in a cup
- Cup falls to the floor
- Cup pulls a string attached to a pin
- Pin pops the balloon
This design uses multiple levels and introduces gravity and string mechanisms. Build and test in sections of 2–3 steps each.
Step-by-Step Instructions on How to Build Your Machine
Step 1: Start With the End Result and Map Out the Steps
Decide what simple task your machine will accomplish. Popular options include ringing a bell, popping a balloon, knocking over a toy, or dropping a ball in a bucket. Work backward from this goal, asking “What action would cause this to happen?” for each step.
Step 2: Sketch Your Design
Draw a simple diagram showing each step and how objects will move. Include top and side views to understand spacing. Your sketch doesn’t need to be perfect, just clear enough to guide your building.
Step 3: Gather and Organize Materials
Collect everything you’ll need based on your design. Sort them by function: things that roll, things that fall, ramps, and connectors. Having everything organized makes building much easier.
Step 4: Build and Test in Sections
Don’t build the entire machine at once. Create sections of 2–4 steps and test each section at least five times before moving to the next. This makes troubleshooting much easier. If a section doesn’t work, adjust spacing, angles, or force until it runs reliably.
Step 5: Connect Sections and Refine
Once individual sections work consistently, connect them. You’ll likely need to adjust spacing and timing where sections meet. Test the complete machine many times, making small adjustments after each failure.
Common Problems and Solutions:
- Timing Issues: Adjust ramp angles to speed up or slow down steps. Add friction with rougher surfaces to create delays.
- Insufficient Force: Increase ramp height for more speed, use heavier objects, or make triggers easier to activate.
- Parts Falling Over: Secure lightweight items with tape. Create wider bases for tall components. Check that your surface is level.
- Alignment Problems: Create channels from cardboard to guide rolling objects. Use funnels or wider targets for easier alignment.
Remember that failure is part of the process. Each failed run teaches you what needs adjustment. Test one change at a time so you know what actually works.
Testing and Troubleshooting Your Machine
Testing isn’t something you do once at the end; it’s an ongoing process throughout the build. The way you approach testing determines whether you’ll feel frustrated or empowered when things don’t work on the first try.
Test Early and Often
Testing each new element as you build helps catch problems when they’re easier to fix. Follow these steps to keep your Rube Goldberg machine running smoothly:
- Test each new element: If you add a ramp, test it before building the next step.
- Fix problems as they arise: Testing as you go helps you identify the source of an issue instead of troubleshooting multiple problems at once.
- Repeat successful runs: Once a section works, test it at least five times before moving on. A machine that works consistently is more reliable than one that succeeds only once.
Make One Change at a Time
When something doesn’t work, resist the urge to change multiple things at once. If you adjust the ramp angle, move the domino closer, and add weight to the cup all at the same time, you won’t know which change actually helped. Make one adjustment, test it, then make another if needed. This systematic approach teaches you what actually works.
Keep Track of What You Try
Track your tests to spot problems, compare results, and improve your Rube Goldberg machine.
- Document your attempts: Write down or take photos of different configurations to remember what you’ve tried and avoid repeating unsuccessful approaches. For example: “Attempt 3: Moved cup 2 inches closer; the marble landed inside but didn’t tip it. Try heavier marble next.”
- Record test runs: Use a smartphone to record your machine in action. Watching the footage in slow motion can reveal problems that are hard to spot in real time, like a ball bouncing off course or a domino barely missing the next one.
Know When to Simplify
Sometimes a step that seemed great in your head just won’t work reliably. If you’ve tested and adjusted a particular section ten times without success, it might be time to try a simpler approach. A basic ramp that works every time beats an elaborate pulley system that works only occasionally.
Ask yourself: Is this section getting closer to working with each attempt, or does it fail the same way every time? If it’s improving, keep adjusting. If it fails the same way every time, the design itself might need rethinking.
Celebrate Small Victories
When a single section works for the first time, that’s worth celebrating. When you successfully connect two sections, that’s another win. These small successes build confidence and keep you motivated. Don’t wait until the entire machine works to feel proud of your progress.
Remember that every builder, even experienced engineers, faces failures and setbacks. The difference is that successful builders see each failed test as information, not defeat. You’re not failing; you’re learning what doesn’t work so you can discover what does.
Start Building Your Chain Reaction Today
Building a Rube Goldberg machine develops problem-solving skills, teaches physics concepts, and encourages creative thinking. Whether you’re working on a school project or a family activity, these contraptions provide hands-on learning that students remember long after completion.
Ready to take the next step in your child’s education? Explore K12-powered schools that combine personalized learning with hands-on activities to build critical thinking skills and support your child’s interests. Find a K12 school near you to get started.